Showing posts with label Randy's R60/2. Show all posts

Wednesday, August 08, 2012

Installing new tapered steering head bearings and headlamp nacelle mounting

These new tapered steering head bearings should be a standard upgrade on any Slash Two that still has ball bearings in the head stock.

I removed the bearings and races in a previous blog post. Now we are installing the new bearings. 
Tap the bearing races home with a suitable drift and heavy mallet. 
Removing the old races from the nut isn't a problem if you....
Stack the assembly on a 22mm socket.
Then place a 41mm socket on top and tap with a plastic mallet.
Even though the new bearings came greased. I like to thoroughly clean them with solvent and run them in my fingers to check for smoothness. 
Then I grease the bearings in my trusty bearing packer.  Compared to a royal sized mess packing using your fingers, this method only makes a medium sized mess!!
Tap down the inner race on the fork using a brass drift.  Tap only on the inner race and go evenly around to ensure it settles in evenly.
Press the other bearing inner into the cap nut using a vice.
Arrange some support for the fork and front suspension assembly.
Locate the fork in the head stock.
Spin on the nut and cap assembly and tighten down past the point of snugness.  You want to settle the bearings, then back off to the point where the play is eliminated.  Go back and forth a few times to make sure you have it right. You want to snug it up just to the point where the play is eliminated.
When you put the upper fork plate on, check the clearance provided by the old spacer. It may have changed with the new bearings. If so, get a different spacer, or add spacers. You want the plate to settle evenly on the outer fork uppers and the inner nut cap.  You don't want the plate to bend when you tighten down on center nut.
Now we'll mount the head lamp nacelle. Place a piece of rubber hose about 3/8" long in the hole.
Arrangement order: outer washer, rubber washer, headlamp ear, rubber washer, headlamp shell.
Posted by Picasa

Tuesday, July 31, 2012

BMW Slash Two wheel bearing pop quiz - Let's play "what's wrong?"

Yesterday, after disassembling the wheel bearing and seals from Randy's Slash 2, I noticed that the wheel bearings needed to be replaced. Today, I obtained four new bearings. New SNR 30204A.

After arranging the parts on my workbench, I began to get confused.

Some of the spacers appeared to be incorrect.

I labeled them with "Wrong part?" 


Three of the end caps that retain the felt washers were mangled and are on order now.


There was also a missing felt seal that is on order. The other felt seals are in good shape.


Two of the collars appeared to be incorrect parts. Here's one:


Maybe someone made this part to replace a missing or damaged part?  Even so, the new part is shaped incorrectly and it has a large gouge in it.


This felt seal arrangement is an early design that was later replaced with a rubber seal system. However to do that, you need to upgrade several other parts. Here's a diagram showing the new style seal:


New Style Seal


From Bench Mark Works site:

36 31 4 038 230--$9.95--seal hub plug late R50/2-R69S
36 31 4 038 243--$25.00--wheel thrust sleeve LHS for late hub plug R50/2-R69S use in 36 31 4 038 272
36 31 4 038 272--$69.00--hub plug late style  R50-R69S requires use of new type sleeve 36 31 4 038 243 and 36 31 4 038 230 seal 

On the brake drum side, You can also eliminate #4, 5 & 6 by using this:
36 31 4 038 259S--$10.00--seal substitute for the felt ring and cover inside wheel RHS R50-R69S

So we are looking at close to $200 to upgrade to the new style seals. I felt that the upgrade was too expensive for this build.


I will order new end caps and seals in the old style, and will instead try to source used parts to replace the parts marked "wrong part?" in my photos below.

36 31 4 038 259F--$2.00--felt ring RHS and inside old style hub plug R50-R69S 
36 31 4 038 255--$6.50--cap for felt ring early wheel hub plug and inner wheel RHS felt seal R50-R69S

Hmm.  What to do!?!

Posted by Picasa

Thursday, July 26, 2012

Servicing the Earles fork

Today, let's focus on servicing the Earles fork.

I always try to keep a new set of tapered bearing and sleeves on hand incase a customer bike comes in with worn old style ball bearings, or even worn tapered bearings.  It is too dangerous to ride with bad bearings and I will always recommend replacing them as soon as possible with new bearings.  Tapered bearings far outperform the original 23-ball-race factory bearings.

Tear down on this R60/2 showed me that the head bearings need to be replaced. They had a notch at the center position. You can check this when the front wheel is off the ground and the steering damper all the way loose.  Move the steering left and right through its travel and if you feel a "notch" or drag at the center position, the bearings are probably shot.  Later in this article, I will also tell you how to determine if your steering bearings are too tight or loose.

State of affairs.

Support the front of the bike on jackstands or blocks of wood.  I normally connect a safety strap to a ceiling joist when I am jacking a bike. Remove the front wheel, brake and set aside.

Remove the swing arm axle nut and unscrew the bolt.  The nut serves as a lock nut.  The bolt is threaded into the fork and tensions the bearing.

Earles Fork Spacers are bike-specific and side-specific.  Some don't use one spacer, or both are on one side. Note the position of the spacer washer(s), if any.


Earles swing arm pivot bearings. These are lubed and looking pretty decent.
Left side looking good too.

Clean bearing races of old grease. 
Outer races for Earles fork swing arm bearings are worn (showing bearing shadows) but not detented.
The other side looks ok too.

Apply new grease. (Wheel bearing grease.)
Fresh grease.
Seals look good.
Before repacking with grease, I did spin the bearings dry to get a feel if they were smooth.  They were.
State of affairs.  
Removing the Earles fork top plate.
Someone had arranged the harness through the fork square so I had to remove the wiring harness from the ignition board in order to remove the headlamp nacelle.  A bit of a delay, but it gave me time to clean and seat the bulbs in the green and red sockets.
Upper lower race. Rusted and detented.  There was only a little dried grease here.  These may have never been serviced in 50 years. 

Lower upper race looks like original factory grease. Race is dented.
Lower inner race.
Upper top race is detented and dry as a bone.  Pitted.
Posted by Picasa

Wednesday, July 25, 2012

Randy's R60/2 - Initial overview


The owner of this Slash Two is very nice fellow named Randy. I had a chance to chat with Randy about his short term goals for the bike, and also give it a once over.


Randy says the motor was built by Joe Groeger.  The rest of the bike looks mechanically sound.  There are some cosmetic blemishes that Randy is ok with...for now.  His main goal is to make this bike into a driver that he can enjoy on a regular basis.

I've arranged with him to perform a reasonable mechanical inspection of the bike and assemble anything that is currently disassembled. When required, I'll be installing new parts.


  • Assemble bars and controls and grips
  • Install Tank and lines
  • Build and install carburators
  • Install air cleaner assembly and intake tubes
  • Install battery
  • Adjust brakes and bed new brake shoes
  • Fix adjust horn
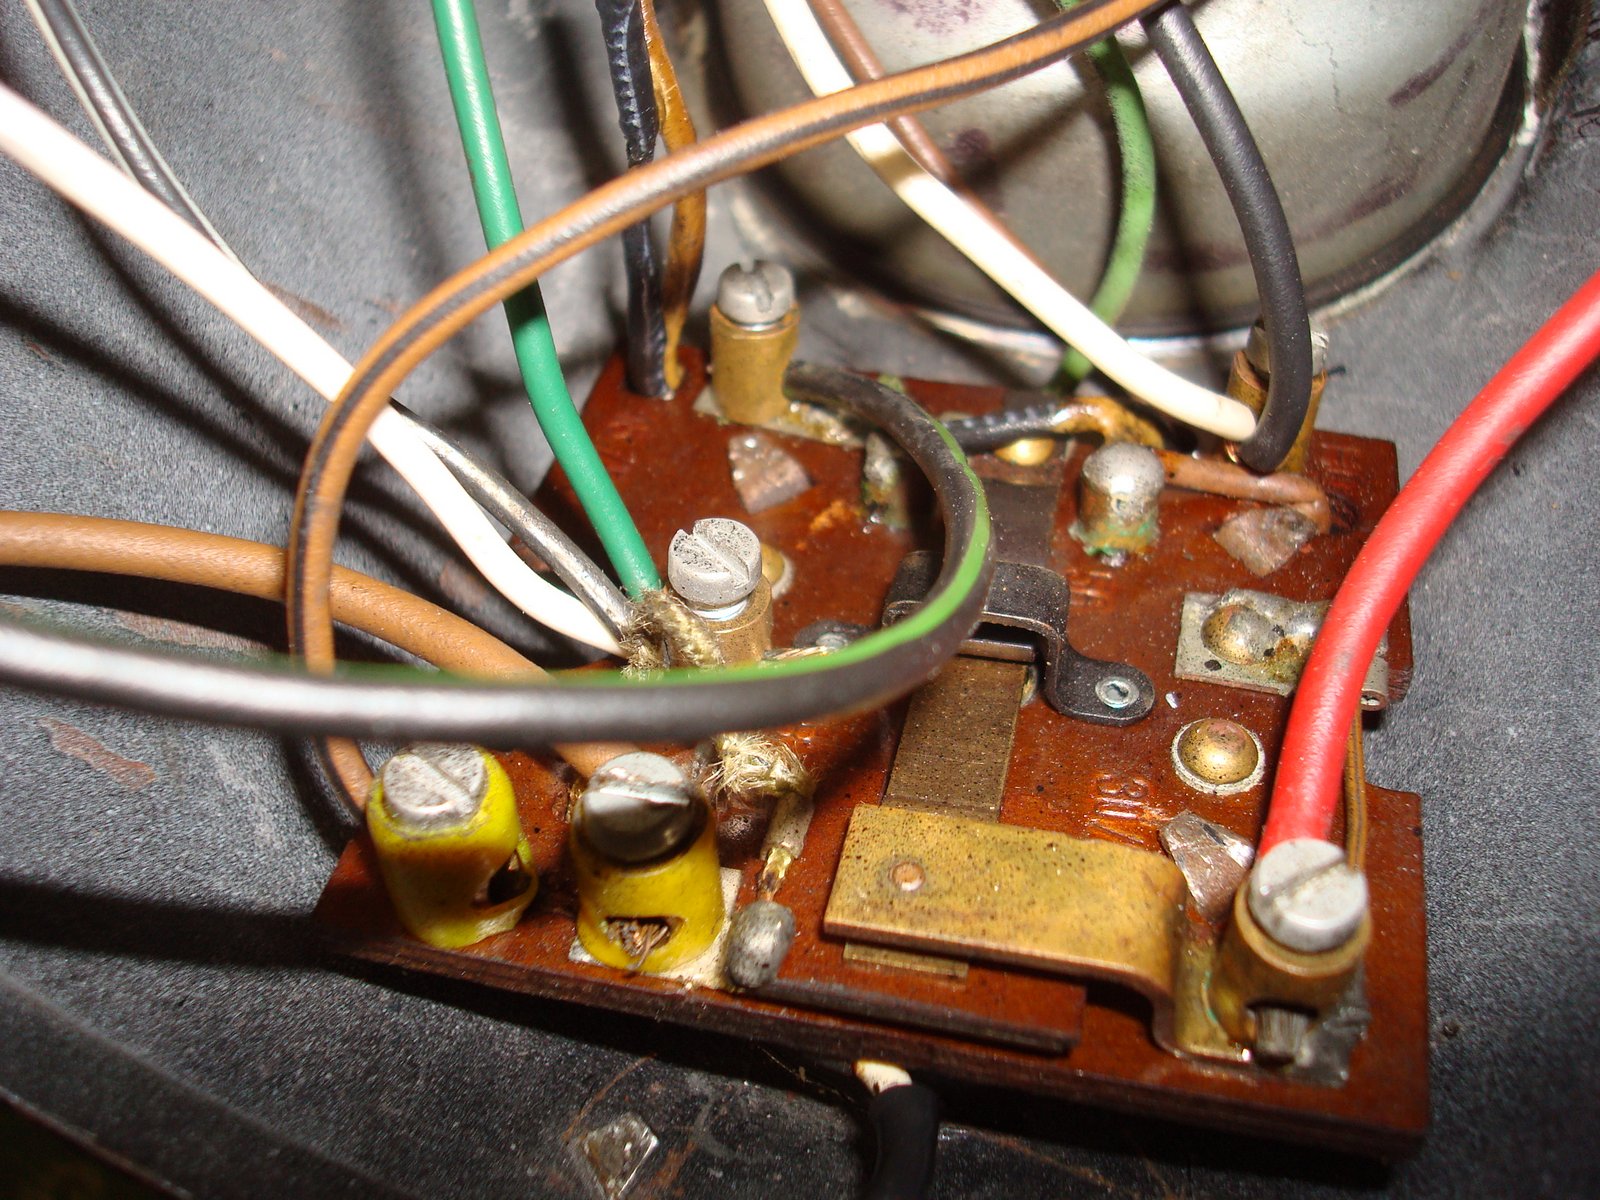
  • Check differential timing, valve adjustment, magneto functions and brushes, points
  • Clean, inspect and grease Earles swing arm, steering head, rear swing arm, wheel bearings
  • Repair a broken center stand and side stand
  • Procure and install mirrors
  • Repair a bent rear brake rod
  • Install new tires and tubes, balance wheels
  • Repair and install Denfield solo seat
  • Tune and test 

Let's have a look around and see what needs to be done. 

Looks like the Intake boots will need to be replaced.


Carb intake boots cracked. 

The Brown side stand is missing some parts and someone tried to weld the main hinge bracket to the frame. Also, the main bracket is bent. Will need to consult with Randy to see if he wants to grind off the stuff on the frame and procure a good used Brown stand. 


Brown stand bracket bent was previously welded to frame.  :-(


Some light fixes to the Denfield seat bracket are also on the menu. I centered the pivot bushing and reweleded the cracked seat frame.   


Denfield Seat bracket bushing is off - center.

Bushing centered.  NBD!


Denfield seat bracket weld is cracked.
 Denfield seat bracket repaired.

The toe pin on the center stand was busted and bent so I enlisted Blaise's help to torch the pin and bend it back straight.  Then I was able to reweld the pin into its proper location in the center stand.  Blaise has a PhD in metal.


Center stand toe pin repair.

More to come....